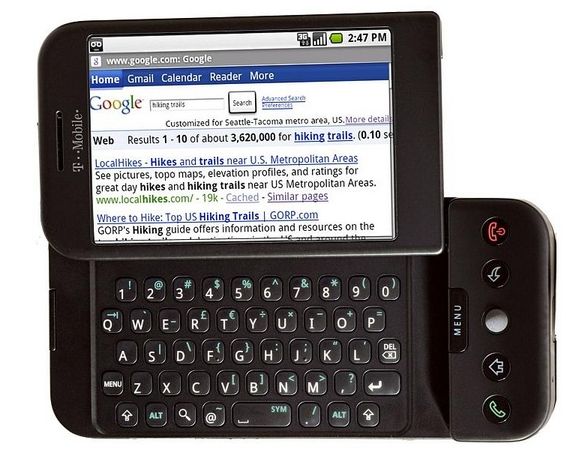
Today I finally got around to rooting my UK T-mobile G1,
While I work with and “hack” linux all day long modifying my phone was something I have never had the real urge to do. I very rarely use my phone as I always either have or am close to a computer/laptop and the t-mobile 3g signal is useless. I decided as I have some free time today that I will give it a go anyway – to my surprise it is actually surprisingly easy, all of the work is already done for you amongst the very large community of users.
I initially looked at these 2 forums,
forum.xda-developers.com
modmygphone.com
Which then I simply ended up using
http://www.ryebrye.com/blog/2009/08/16/android-rooting-in-1-click-in-progress/ but did also read http://androidandme.com/2009/08/news/how-to-root-a-t-mobile-g1-and-mytouch-3g-android-phone/
Overall I am still surprised how much of the work is actually done already. One thing that worried me was the differences between the US and UK in the phones themselves as I do not pay much attention to phone modding this is something that could potentially be a problem, I wasn’t sure if I should be worried about it (Especially with all the disclaimers about being targeted for the US version only) but it seems to have worked fine. I only ran into 1 issue which had nothing to do with that and I will describe the details below below.
I mostly followed the ryebrye instructions and this is what I did.
– On my laptop I downloaded http://g1files.webs.com/Zinx/flashrec-20090815.apk , copied this over to the SD card.
– Used the market to find a file browser as I couldn’t see one by default. The one I downloaded was FileDroid Lite.
– Installed flashrec, opened it, clicked “Restore Backup Recovery Image” then “Flash Cyanogen Recovery 1.4”

I then rebooted the phone into recovery mode by turning the phone off, then holding the home button and the power button at the same time. The recovery system did appear as described,
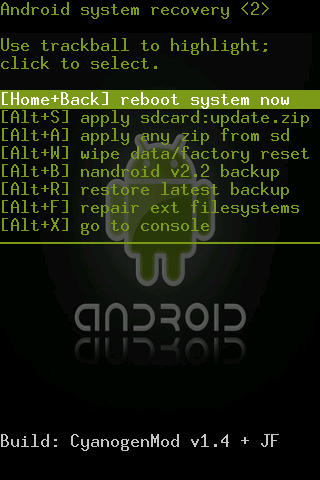
I selected the “nandroid backup” at this stage to backup the phone settings. At this point I had thought that was it completed but this is actually only to be able to load the images. So I booted the phone again. Then on my laptop I downloaded, update-cm-4.1.99-signed.zip from http://n0rp.chemlab.org/android/experimental/ and copied this to the sd card. I rebooted the phone again back into recovery mode and selected “wipe data/factory reset” and then “apply any zip from sd” and selected update-cm-4.1.99-signed.zip. After hitting home and waiting for it to install I rebooted the phone. It was said to be patient as it takes longer to boot but after 20 minutes I realized something was up as it was still stuck at the t-mobile logo. I powered it back into recovery mode and instead of selecting “restore latest backup” I accidentally selected nandroid backup again which I paniced, aborted (pulled the battery out) but after turning back into recovery mode it was unable to restore the good image as it had already been overwritten. At this point I had thought that I have bricked my phone as without a card reader I have no way to put an image to the SD card but as it turns out you can mount the SD card from the recovery console.
So I selected “go to console” from the menu and plugged the data cable back in to my laptop then executed,
echo /dev/block/mmcblk0 > /sys/devices/platform/usb_mass_storage/lun0/file
Which done the trick, I was able to copy new roms to the sdcard and get my phone back and working. From reading the forums (This thread) I read the instructions again and noticed signed-dream_devphone_userdebug-ota-14721.zip was required from http://developer.htc.com/adp.html#s3 so I copied this to the SDcard and booted back into recovery mode.
I selected “apply any zip from sd” and then signed-dream_devphone_userdebug-ota-14721.zip , once this was installed and the phone rebooted (I held home again) I selected “apply any zip from sd” again then selected the previous image (update-cm-4.1.99-signed.zip). Once this finished installing I rebooted the phone and success! it actually booted this time. After filling in the gmail info everything seems to work fine and all my contacts are there.
The first thing I done was check the console which this rom comes with a nice app “Terminal Emulator”, I executed “su” and was prompted to allow the superuser permissions (I assume this is from the “superuser permissions” app which seems to be installed and low and behold I was root.
Overall very easy process so a huge thanks to all the people that I linked to during the course of writing this. Hopefully I will get some time to play around more and write some scripts/apps that will benefit me and others.